Hackers use automated bots to constantly scan the internet for the default Remote Desktop port (3389). If they find it open, they launch “Brute Force” attacks to guess your password. This not only puts your data at risk but also consumes your server’s CPU, making it slow.Change RDP Port
The best defense is simple: Change the port number to something unique. In this guide, we will walk you through the process step-by-step.
Do not restart your server after Step 1 until you complete Step 2 (Firewall). If you forget the Firewall step, you will be locked out of your server!
Step 1: Edit the Windows Registry
First, we need to tell Windows to listen on a different port. We do this via the Registry Editor.
- Press
Win + R, typeregedit, and hit Enter. - Navigate to this specific path:
HKEY_LOCAL_MACHINE\System\CurrentControlSet\Control\Terminal Server\WinStations\RDP-Tcp - Find the file named PortNumber on the right side.
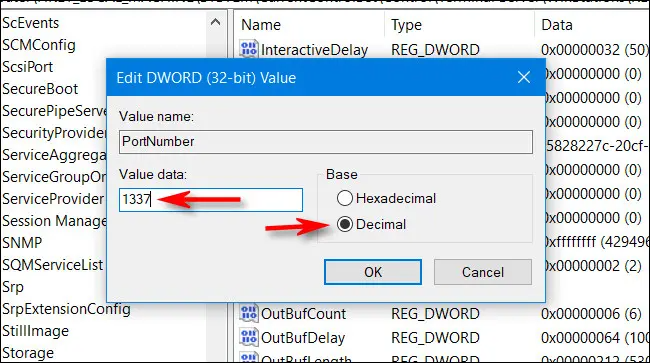
- Double-click it, select Decimal, and change the value from
3389to your desired number (e.g.,4545). - Click OK.
Step 2: Update the Firewall (Crucial Step)
Now that Windows knows the new port, we must allow traffic through it via the Firewall.
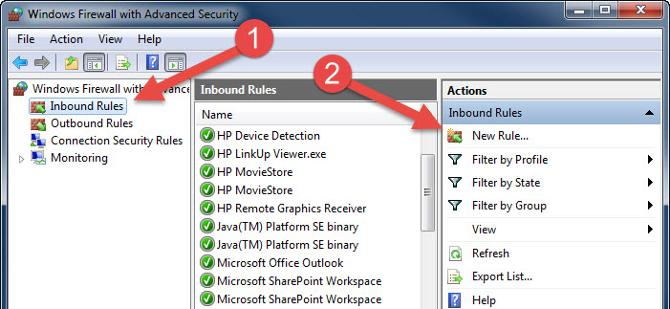
- Search for and open Windows Defender Firewall with Advanced Security.
- Click on Inbound Rules (Left menu) > New Rule (Right menu).
- Select Port and click Next.
- Select TCP and enter your new port number (e.g.,
4545) in the “Specific local ports” box.
- Click Next, select Allow the connection, and keep all profiles checked.
- Finally, give the rule a name (e.g., “RDP Custom Port”) and click Finish.

Step 3: Restart and Connect
Now it is safe to restart your server. Once it reboots, the old port (3389) will no longer work.
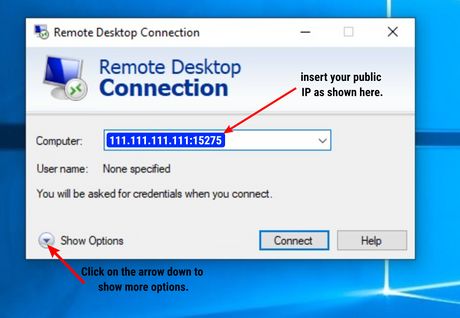
To connect, open your Remote Desktop Connection client and type your IP address followed by a colon and the new port number. Example:
192.168.1.50:4545
Secure Your Business with WPressly
Changing ports is a good start, but real security begins with a reliable hosting provider. At WPressly, our infrastructure is built with security in mind.

- DDoS Protection: We mitigate attacks before they reach your server.
- Regular Backups: Your data is always safe with us.
- 24/7 Monitoring: We keep an eye on the network so you can sleep soundly.